Wednesday, April 16, 2014

Version 0.31 update

I've been working on preparing the design for production this summer, as we've now hit 10 weeks until I leave for Ghana. I've re-packaged the CAD model (Dragon 0.31) and uploaded it, but more importantly, the Google Drive Repository now includes PDF blueprints. This effectively marks the release of the design for public development, and I hope to implement more detailed assembly instructions and imagery as the design continues to evolve.

I've been working on assembling a copy of 0.31, using "basement power tools" level equipment. I'm not entirely satisfied with the system, particularly with the supports for the cam assembly. I'll be redesigning those and releasing a new update (0.32 probably) within the next week or two. However, I have assembled a case and functional front access cover, which exceeded my expectations. By using a sheet steel and end cap design, I've been able to reduce the thickness of sheet steel to 28ga  -- about 0.3mm. This has brought cost down by an order of magnitude, and makes cutting and bending components far easier.

While the incorporation of plywood has eased assembly and reduced the complexity of the model, I feel that there's still improvements to be made. I'm interested in replacing the endcaps with sheet metal angle brackets, perhaps riveted. I'm slightly concerned about accessible screws on the outside of the device, and using rivets would also solve that -- while I've designed the case to be impossible to access without access to the rear or the padlock, I'm concerned about encouraging petty vandalism with exposed Phillips Heads. Rivet guns are cheap and readily available in Accra, I'll want to make sure both options are possible. There's also currently unused scraps created from cutting out the case, I'm interested in reducing material requirements by using those.


I've done some initial hunting for sheet steel and other suppliers in Accra, and the results are promising. While I won't know for sure until I get there, it looks like many materials should be easier to find than I've feared.

Here's some pictures of things and such:

Face of inventory chute (PN001), cut from 23/32 plywood

Inventory chute (PN002), also from 23/32 plywood this time

Drilling the mounting holes in the case. Note shameless product placement.

The case was cut by printing the pdf blueprint at 1:1 scale, rubber cementing it over 28ga sheet steel, and using tin snips to cut along the lines. Pretty painless. All blueprints are also fully dimensioned, allowing traditional layout methods as well, if a printer isn't readily accessible.

Here's the case and inventory chute inside. Note the lock mount, and two hinges. These aren't in 0.31's CAD models or blueprints, but I'll incorporate them in 0.32.

Mostly closed. The 40x150mm slot for the customer to recieve the product hasn't been cut yet, since I'm still adjusting the design of the cam mechanism and the location may change slightly.

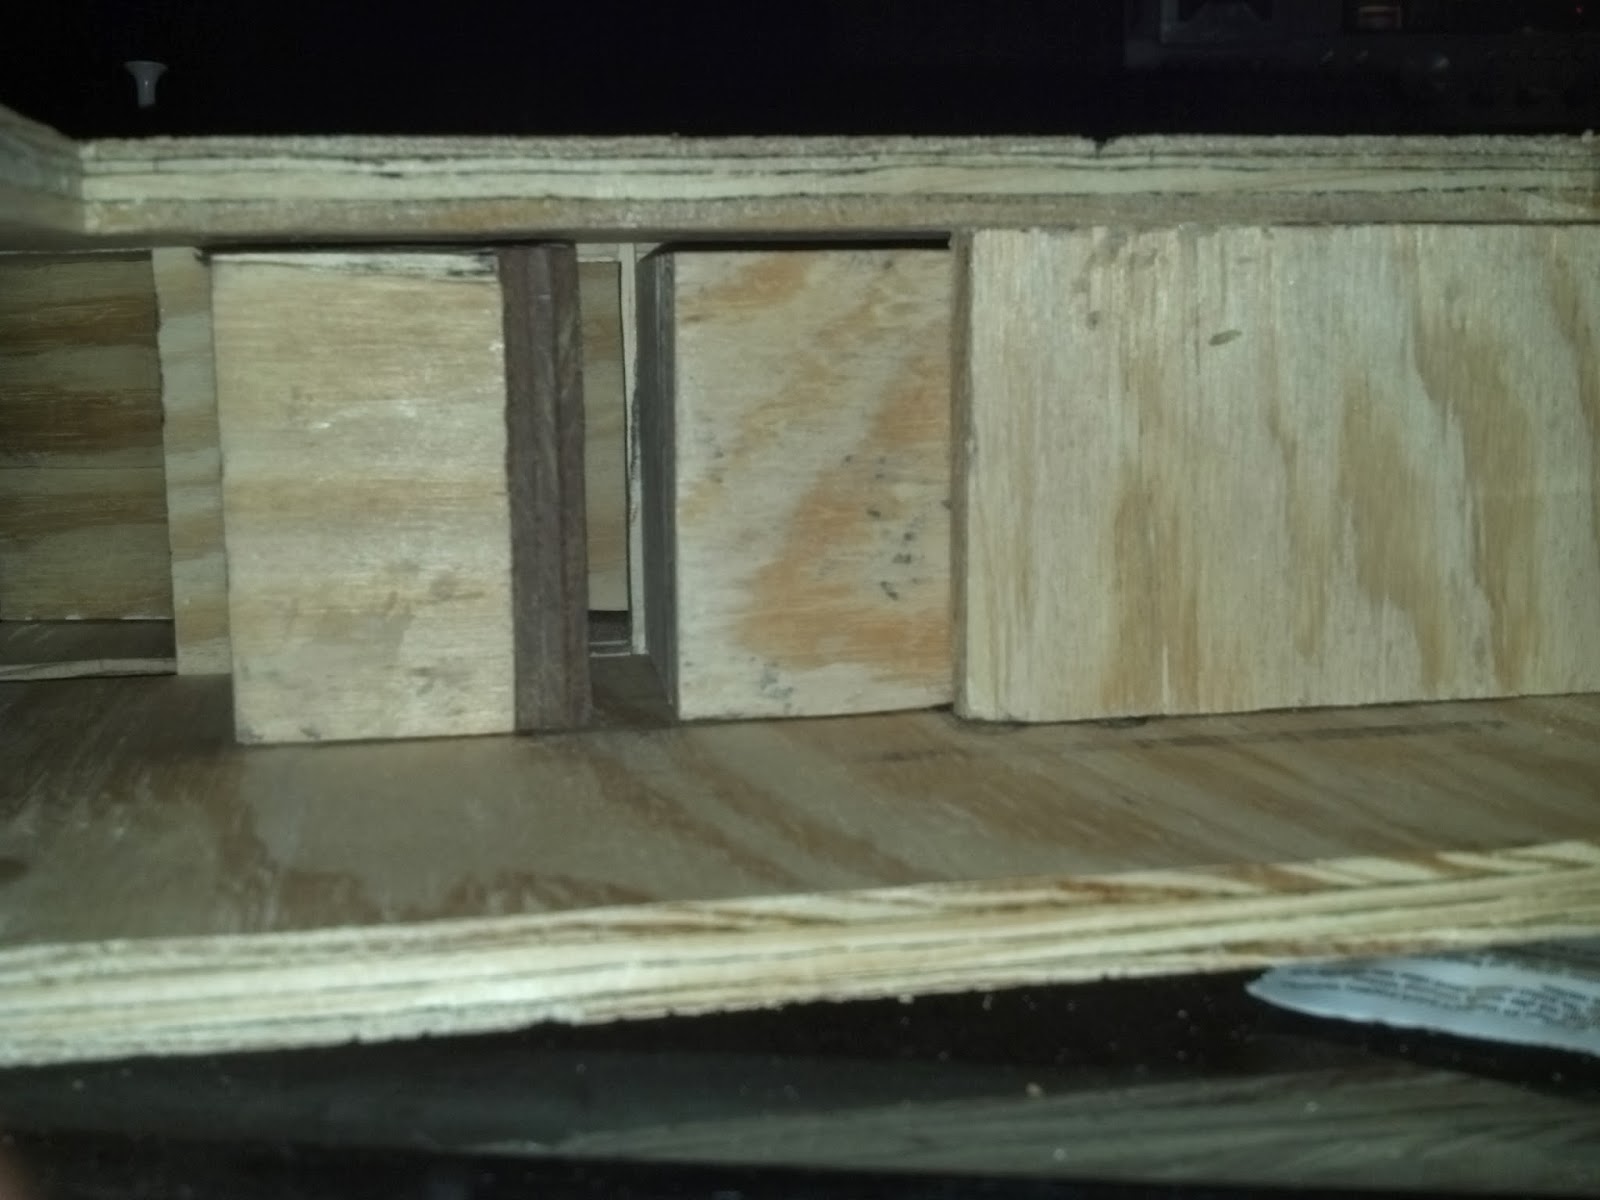
Case, in open position, and removed inventory chute. The blueprints are still on the outside of the case, since they look cool and I'm too lazy to remove them. It's also much easier to mark on paper than the steel underneath, and protects the steel from scratching during assembly.

Saturday, March 15, 2014

Spring Break Report

I've noticed the double vend issue is persistent occasionally, particularly with very thin packaged condoms and even more so when a section of the inventory is all thin condoms. I think that further reducing the height of the aforementioned face slot by another increment will clean this up more. I've redesigned the inventory chute with thicker plywood and the inventory height adjustment, and a few other minor details.

I've also redesigned the case to reflect a coin mechanism location, and reduced overall dimensions -- (190mm W, 475mm H, 155mm D)  compared to (275mm W, 500mm H, 120mm D) for the current model -- 50.8% volumetric.

This also has reduced the amount of sheet metal required from 8 sqft. to just over 3.5 sqft. This of course isn't free, the new model incorporates 3 sqft of plywood which was not included in the previous design. However, this version 0.3 is also weld- and machine-screw free, incredibly. This eliminates welding equipment from the assembly requirements, as well as specialized hardware. These joints have been replaced or redesigned to incorporate tapered thread screws -- think wood screws, or drywall screws -- that's the thing, they're very interchangeable and far more common.

I've uploaded a copy of my working folder for this project, in the spirit of open source. The folder will be maintained at Google Drive, accessed (read- and download- only) at the following link. The data is provided under GNU FDL.

Current CAD models are in proprietary Solidworks format. I'm looking into options for exporting the data to a more friendly format, such as STL or another polygonal format. This does, however, preclude the end-user from practically modifying the design. There are open-source CAD formats available, I'll have to look further into those possibilities.
Perspective view, note new shield design, coin tray, braces, removable inventory chute (slides out front), secure vend slot.


Partial cutaway view of mechanism

Side view, cutaway

Side view, gear orientation


Wednesday, March 5, 2014

New Inventory Chute, Goodbye double-vends.


Over the last few days, I've put together a new inventory chute assembly, to attempt to correct the issues with double vends (~10% of the time) and non-vends (~3% of the time). I hypothesized that the gap on the front of the inventory chute through which condoms are dispensed was too tall, and thus allowed multiple thin condoms to slip through easily.
New (L) vs Old (R). Note the reduced size of the (L) interface plate.
I made some other modifications to the geometry of the interface plate and system, reducing the depth by .500", the width by 2.00", and increasing the usable height to the full 12" height of the chute.


New and Old, side by side. You can see the reduced width, and the elimination of the brown "liner" components. The width and depth of the access slot has also been increased, allowing much easier stocking.
Installed. Note the reduced width, the right cam has been slid left about 2.5"
 I ran about 150 condoms through the device. The current capacity is about 100 condoms, at 50 per chute per 12". The chutes could be extended vertically to an arbitrary height and capacity at this rate.


Although the overall success rate is still right at 97%, I've basically eliminated the double vend issue. I believe that by adjusting the z-position (depth) of the chute vs. the axle, I can improve on this further.

Further bulletins as events warrant! Things are looking nice.

Wednesday, February 19, 2014

Quick note

I ran a little over 100 condoms through the machine last night, to get some quick estimates of where it's at:


I'm going to collect three or four more data sets today. Right now, it's an 88% success rate, with 9% multi-vend and 3% non-vend. I think that can be greatly improved on. The left chute seems to be misbehaving a lot, it's also the slightly smaller one -- there may be a connection.

Monday, February 17, 2014

Stuff's Actually Working?

As I mentioned last time, I'd returned to the original Soaring Dragon design, in the hopes of fixing the issues with the inventory system. I think it actually worked. I redesigned the bottom plate which forms the interface between the two cams and the two inventory stacks, ending it 3/8" from the front edge of the condoms, instead of flush. This effectively changed my 1/4" high inventory vending "slot" into a  (3/8"i,1/4"j) open area.

It's kinda hard to see everything at this angle, the gap between the two pieces of identical metal fell behind the third identical metal rod. But you can figure out how things work. Note that the cams are in their normal positions post- or pre-vend, and that one's actually engaging the condoms at Top Dead Center. This is early kinematic design actually working, incredibly. If you look wayyyyy back to the beginning of last semester, I was running kinematic simulations with different cam profiles, and settled on this one because it "lifts" the stack of condoms out of the way, ensuring only one is likely to be vended. What you see here is that exact design actually working. I'm as surprised as you.


Check it, that's what things look like in slo-mo. The wooden blocks you see being moved are to provide a little bit of weight, keeping the condoms nice and orderly. They also could be notched to catch the cams if they came around "dry", making it effectively impossible to "lose" a coin in the system if it's out of inventory. I'll try this on the next prototype, definitely.

If you were paying close close attention, you saw that once the coin has been fully chomped by the system, you're given 10-20 degrees of wiggle. This is incredibly useful -- I aligned the cams so that they "barely" kick the condom out, so sometimes it seems like the machine hasn't vended -- Frustrated, you wiggle the handle, and... ta-da! everything works after all. The reason for this "tight" alignment is that, if I align the cams slightly further forward-phased, the device frequently over-vends and spits two condoms at once. It seems that there's a happy sweet spot of about 10 degrees surrounding Top Dead Center that is the best way to orient the cams -- so, if you're ever trying to build one of these, that little tidbit will save you weeks of problem-finding.

I also mentioned that I'd moved to more rudimentary materials for the new inventory system -- I used a scrap piece of sheet aluminum for the new interface plate, but everything else (new) is wood, plexiglass, or screws. It's not too precise, but precision isn't important for everything but the interface plate -- plus, it's much easier to assemble with simpler tools, not too mention far cheaper -- scrap wood is practically free.

FrankenDragon, with Nalgene for scale.
As you can see, the new single-piece inventory rack dominates the inside of the device. But there's also an incredible amount of wasted space still -- now that things are working, I can probably reduce the volume of the system by 40% or so.

Oh, did I say things were working? Right! This new inventory chute solved most of the problems with Soaring Dragon. Check it out:


Heck yeah.


Here's another vend.


Here's a shot of seven or eight consecutive vends. Everything's working great...

I have about 50 condoms here for the project. I loaded up each tray with half (incidentally, in the current dimensions, the device can hold about 2*100 condoms) and cranked them all through. After repeating this twice, I've yet to have the device not vend, and I've had about four "double vend" incidents. Here's what that looks like:

One condom is spat out the usual down and out direction, but a second was caught by the cam, and slips out above that condom and below the plexiglass lip. I think I can reduce the height of that gap by perhaps .050", maybe that will improve double vending statistics. As it is, I vended roughly 100 condoms tonight for perhaps 95 quarters. I'll spend tomorrow taking ten or twenty "data sets" of as many condoms as I can, and have some meaningful statistics from that to baseline against for improvement.


I'm really excited that I've finally got a "working device." From here, I can start tweaking individual variables, and improving upon current baseline usage data. I'm also looking forward to a second model, smaller, and maybe even higher capacity than the current.

More to follow, it should be an exciting week!


Thursday, February 6, 2014

"Soaring Dragon" design, revisited, again

While building the wooden prototype in the post below, I learned some valuable lessons about this whole project. First off, it turns out that condoms are pretty good at self-organizing, but only if there's a dimension that's only slightly larger than their width -- Too wide, and they get caught diagonally. Too narrow, and they jam or don't slide smoothly. Second, I realized that I'd solved most of the issues of inventory storage with this prototype, but vending was still problematic at times. Looking for a simpler approach, that only involved one user input, I decided to apply methods from this design to a new, unified inventory system for the original sheet metal "soaring dragon" design. By replacing the expensive and complex inventory chutes with a single plywood-and-plexiglass design, I reduced the sheet metal parts count by 6, the hardware count by over 25, and the cost of sheet metal manufacture by about 50%. This is significant, I feel, now there's only one major sheet metal component left in the system -- the external shell, which, while the largest, is also the simplest in terms of cuts and dimensions.

I'm adjusting the height of the slot at the bottom -- I think this is the major contributing factor to the persistent trying to vend 1 1/2 condoms problem I'm encountering with every design I've worked on.

If this doesn't iron things out, I'll re-evaluate the geometry of the contact between the condoms and the cam gears -- apart from trying them the other way, I perhaps can move things around to give a better engagement angle.

Pictures to come shortly.

Monday, January 20, 2014

Winter Break Report

Over winter break, I proceeded with, basically, trying to get the prototype to work. The inventory feed chutes proved particularly troublesome. While building off previous CAD work, I failed to check the dimensions of an average condom package against the dimensions found in the file, and subsequently manufactured.

The inside cross-section of the finished chutes was about 1/4" too small on all sides, which meant condom packages had to be either jammed into the chutes, or trimmed to an unrealistic size. Without the proper tools for sheet metal manufacture at my house, I realized that I'd be unable to fix this problem until returning to RPI's facilities.

During my meeting with Professor Walczyk and David Banks last semester, Walczyk pointed out that a simpler design to use is the "drawer feed" device, which is widely used and proven throughout industry. By reducing the concept of a condom vending machine to the problem of moving a small object from point A to point B, we can make use of proven inventory feed methods from industrial engineering.

Given that production issues were showing the current prototype to be difficult to work on in a low-tech environment, and that I was left with nothing to do for a month, I threw some  sketches of different designs together. I decided to also make use of this opportunity to try building a model from whatever I could find on hand, with only whatever tools could be found in a rudimentary shop, or a typical engineer's basement.

The original drawings were done on the back of a US Airways courtesy card, I'll have to upload a picture as soon as I find them again.

The images you see below are from a model I built last weekend, quite literally, in a typical engineer's basement. Raw materials included 8 square feet of 1/2" plywood, a few handfuls of 2" wood screws, and a few scraps of 1/4" plywood and duct tape. Multiple copies of the model seen can be cut from a single (in the U.S., 4ft x 8ft) sheet of plywood, which is a typical building material across the globe. The only tools I used, in keeping with the idea of simplicity and third-world production potential, were a jigsaw, table saw, and handheld drill/driver.


Front panel removed


agitator up, able to load, unable to vend -- note interference lockout
agitator down, unable to load, able to vend. note no lockout, plywood is raised out of slot.


Front view


Inventory in the hopper. Note that agitation has stacked it all near the vending slot, and how the narrow width prevents condoms from turning sideways in the hopper.

As you can see in the partially assembled "cross-section" views, the device contains a large hopper, which is slightly wider than a condom. This hopper leads to a slot, and can be agitated freely using the agitation handle, which currently resembles a screw. By allowing the hopper's internal geometry to be shaken, condoms can be persuaded easily to slide into the needed slot, form orderly stacks, and unjam, all without tedious arrangement of inventory or complex mechanisms. Once the customer observes that a condom has fallen into the slot, through a small window in the front of the device: (In the actual production model, this would be a plexiglass window or a small hole, too small to remove a condom through. At this point, the customer still hasn't payed).
 
Not ready, keep agitating
Take me home!


he then inserts coins into a washing-machine-like coin mechanism. These look like this:


On the device, this would go on the long handle-like paddle component. The coin device bolts to a stationary case, and provides a few inches of forward push near the mounting point -- in this case, sliding the slot-containing paddle-handle-thing forward, and allowing the condom to fall off the shelf, and into the waiting customer's pockets.
Slot-containing-paddle-handle-thing. Coin mech plunges in from far right edge.
paddle-thing, retracted, loading inventory. Note the shelf and lack of access from underneath
paddle-thing, extended during vending, from below. Note the slot has moved past the shelf.


This two-step vending process isn't terribly complex, and makes quite a bit of sense when indicated with large numbers drawn onto the device's case. By waiting until the condom is definitely ready to vend before accepting the customer's money, the device guarantees a 100% success rate of currency-to-condom conversion.

I'm still encountering only one major problem. The major one I've found is that the device sometimes vends two condoms instead of one. I've never observed three or more, nor have I seen the device jam and attempt to vend 1 1/2. I've tweaked the size of the slot, and attempted a few other fixes, but it seems to be far easier to get a condom to slip into the vending slot (requiring 2 agitations average) with this configuration than with any other (closest being with a slightly narrower slot, but this requires usually five or six cycles of the inventory agitator, by which point the customer's typically given up and moved on). My recommended solution is to ignore the problem, and simply take into account the average number of condoms vended each time when calculating the cost to charge per condom, I doubt the second inventory will go to waste if the first doesn't.

I'll be presenting my work in person this week, and hopefully I can find a working coin mechanism to install on this new prototype as well. From there, if all goes well and no issues appear, I'll be compiling the blueprints for this design and putting everything together that would be needed to produce these devices.